Social Media

Image

Social media is a tremendous growing industry, literally updating everyone’s lives to an exciting level.  I have always been attracted to the digital side of marketing, but also wanted to be involved in the guerrilla movement of social media. This position with Media Mix gave me that. I believe that social media is a very strong tool, and with the proper etiquette and creative thinking, can be world impacting.

One way to attract your viewers is through imagery. We like to try to use images in most of our posts as to catch the viewers eye. Especially in today’s world, the format that Instagram created is what Facebook has essentially turned into – it is no longer a social network but a photo sharing platform, only better. The artwork below are pieces that I made for Facebook, a newsletter or web banners. I used Adobe Photoshop, InDesign, and a free website called Pixlr.

This slideshow requires JavaScript.

Talent Booking One Sheet

Standard

One of my first projects with Media Mix was assisting in public relations for a motivational speaker and former Jacksonville Jaguar, Tom McManus. Tom was a part of the inaugural team from 1995-1999. Since then, he has accomplished many roles, from radio broadcaster to author and producer.

Tom asked us to help him expand on his inspirational speaking. He has a great background and message, just needed the extra help spreading that to hosts. We listed him on directories, and I made contact with local Jacksonville schools to connect him with athletic directors. We also created a new branding website for him to show his videos and past work with potential clients.

One piece that I made for Tom was his one sheet that we sent out with our contact emails. I arranged it in Microsoft Word (surprisingly, and only because I didn’t have InDesign) and saved it for PDF viewing. It took me a little white to get the arrangement right, but overall we were pleased with it, and it synced with his branding colors. Click here to view the one sheet PDF.

Media Mix Marketing Solutions

Standard

MM_logo_Feb2013

February 3, 2013 – Not a date that most would really care about, unless you’re a Baltimore Ravens fan. It was the 2013 Super Bowl, and just another day to me. I just left my shift at Outback Steakhouse, and drove across town to join my then-boyfriend and his family for the rest of the game. I did not know that would be getting a first-hand crash course on the powers of networking!

It was there that I met my current internship supervisor, Natalie Dunlap, owner and president of Media Mix Marketing Solutions. Media Mix is a local Jacksonville advertising agency specializing in nothing and everything! The agency works in both traditional and digital media, and we are always becoming inspired for more. Even though we are a family of 7, we accomplish large scale projects, such as whole website designs and hosting, TV and radio production, etc.

Since working at Media Mix, I have gone from part-time intern to full-time employee. I have been established as the Social Media Director, managing our client’s social media accounts, Google listings, and performing monthly Search Engine Optimization (SEO) reporting. I have completed many different tasks for our clients, including writing scripts, updating websites through WordPress, established Google places listings, and produced monthly email newsletters.

Creating a Direct Mailer w/ InDesign

Standard

WIB-_logo2LG

The final project assigned in my Basic Computer Images course was one for Adobe InDesign. We were required to think of a service, event, business or some other topic and create a direct mailer with that information. It was to be created on InDesign and have at least one fold in the piece. I went with my involvement in the Women in Business Society to create a flyer for our upcoming Spring Forum. I knew I could easily get the information, and what was better, we might actually look into using these to mail out as marketing for the forum!

The number one obstacle that needed to be jumped was learning the viewpoint on InDesign and how to reflect that to what you are trying to accomplish. My professor gave us the help of asking us to use a regular sheet of tabloid paper and create a “mock-up” of our brochures. This way, we can physically see how it need to fold and how the information needs to be arranged, and from what angle. Once we figured this out, we created the document in InDesign, noting the Facing Pages and making it 2 pages that will be printed duplex. We used the guides in the program to create our fold lines so we knew our boundaries, and then created margins and bleeds that we wanted to use. All that was left was filling it in with information!

My brochure included one folded side where the actual mailing information would be located. The other side of that would include all our sponsors. Once opened to the half size, it displayed the key general information about the event. The full inside spread became a poster that could be displayed around the campus or town. Images of the first page, being the outsides, and the second page being the inside poster, are included below.

This assignment was very helpful to me for many reasons. I learned more about using multiple pages and layout, which I have always been interested in. I played with rotating the views to create different effects and arrange the information in the way easiest to read the brochure. I was able to create an entire poster for an event, my first ever. I played not only with InDesign, but with Illustrator to create the text boxes and logo. This was a very beneficial assignment overall for me.

For a link to a PDF version of my WBS Spring Forum 2013 direct mailer, click here

Women in Business Society

Standard

WIB-_logo2LG

Last semester, I interviewed for and got the position for Marketing Chair for a student organization on campus called the Women in Business Society. This group is based out of the Coggin College of Business, however, obviously you don’t need to be a business major to be a member. Our main goals for the society is to educate and connect our members with the professional community in Jacksonville. We participate in many different volunteering opportunities and help our members with career planning, interview skills, and more.

As marketing chair, my main duties are to design the fliers/posters for our meetings and events, promote those designs across campus and our social media accounts, to which I monitor and play with. WBS has accounts for Facebook and LinkedIn, as well as a new Twitter account that I created for the group.

Below is a gallery of the many fliers and posters I have created so far for WBS. The group traditionally uses the services of Vistaprint to create their fliers. However, as an advertising major, I have been attempting to use the Adobe programs as much as possible to help myself and create more original images for WBS.

This slideshow requires JavaScript.

My next major project with WBS is our upcoming annual Spring Forum. Forum is a full day’s event where we invite many, many speakers, representatives and professionals from different industries to network with our society and campus community. For the forum, we have invited Donna Orender, former president of the WNBA to be our keynote speaker. Alongside her, there will be three different breakout sessions with panels that the professionals mentioned above with sit on. Our members and guests will get the chance to discuss a variety of topics with these leaders, and then attend a networking social with them after the forum.

This is an event that we take great pride in as a society, and is something we work towards all year long. My position as marketing chair slips over to forum where I will help with creating ground signs, brochures/programs, event cards, invitations, table tents, signs and more. After the forum, I will include some examples of those marketing materials in a new post.

Original Skateboards Magazine Ads

Standard

As promised, I have finally provided the final draft magazine ads for Original Skateboards that my agency Wonder+ created last semester. In wanting to practice my skills of Photoshop and Indesign, I tried working on the ads first before sending it to my team for touch-ups.  For example, this first, family-looking ad, I used Photoshop to insert the skateboards in to the image of the entry way. One of my team members, Adam Lankford, edited those changes and added the copy and logos.

Original Family

As for the Businessman ad, our team member Courtney Boydston is an aspiring photographer and spent a good amount of time working with Ricky Horton, the actor, on getting the perfect shot. We chose this shot because of the great negative space to place copy and logos, as well as it being an interesting angle. Overall, we were pretty simple in the ads, but complex in the concept and branding for this campaign.

 Original Businessman

Original Skateboards Campaign

Standard

wonder +

Throughout my Principles of Advertising course, I have been working with my first ad agency – wonder+ advertising. This agency is my class group in which we came up with a agency name, type of agency, individual positions and titles, and it all culminated in a brand analysis and campaign.

Our agency fought a bit over which brand we would choose to represent, but eventually we came up with Original Skateboards. This product and brand was perfect because it allowed our already creative and experienced agency a chance to branch out.

Our agency created three different ads for this project. Not one person worked on them all. Every one of us contributed to each ad. The last two, titled Urban Savvy Businessman and Family Longboarders

were the two we used in our campaign. They will be uploaded to this post soon.

Our final presentation went better than I thought it would. We each chose to wear a piece of red clothing to represent the brand’s colors. We knew our parts well, we executed passing the clicker during the presentation and were under our time limit. We received A’s for the project as a whole! If you’d like to see the presentation, you can find it here.

We went the extra mile with wonder+. We not only created our own website, but also a twitter account and now have a portfolio! You can learn more about our agency by going to our site here. Take the Wave With YouUrban Savvy Businesman

Photoshop Exercise

Standard

On October 8, we began working in Adobe Photoshop. We spent some time going through some basic key functions and tools. We then were given an assignment to create an advertisement. The start of the assignment was a Photoshop document that had images of salad toppings, a cutting board, and a text image.

To move the salad toppings onto the cutting board we used the object selection tool, the magnetic lasso tool, and the magic wand tool. After each object was positioned on the cutting board, we used the quick selection tool to select each object and place it on its own layer. Once each layer was created, we went to the first layer (example: carrot) and created a layer effect. We added drop shadows to each layer, so that every object on the cutting board has a soft shadow.

We then altered the image to be a flatten image, converted the colors to CMYK form, and it’s done! This was our first exercise in Photoshop, which is a practice for tools that we will need for our final Photoshop project. Coming soon!

Object Illustration Project

Standard

This semester, I am enrolled in a course called Basic Computer Images. It focuses on learning the Adobe Creative Suite: Illustrator, InDesign, and Photoshop. This was my first time really working with the Mac/Apple user face and software. I’ve used Microsoft Word on a Mac before, but never thoroughly used a Mac. So the first program that we started with is Illustrator. We went through basic functions and tools. Some of our first assignments involved using the Pen Tool and making Bézier Curves. We used worksheets as templates in Illustrator and make curves and straight lines, then combined them both to create outlines and fills of various shapes. 

Our first project was entitled Object Illustrations. The process was to first sketch out a scene or image that meant something to us. Maybe our favorite place, or instrument, or to basically illustrate something that we enjoy or take pride in. I looked to the easiest inspiration for me: music and writings. I love finding a great lyric in classic songs, or an engaging quote or poem. My all time favorite quote is from Shakespeare’s Twelfth Night. In Act 1 Scene 1, Duke Orsino starts by saying “If music be the food of love, play on;”. I find music to be influential in a person’s life, because every one finds a different meaning in the same words or notes, and its common for us to attach ourselves to songs or lyrics because they make us feel or think about something sentimental to us. Personally, any song or lyric that makes me think of my long-term boyfriend, I remember it. So this line from Shakespeare has stayed with me since high school.

From this line, I imagined a romantic scene in the woods, where there are candles and musical instruments and a bottle of wine and such. So that is the scene I sketched out and used for my image. For the assignment we were required to create multiple sketches and then incorporate them into one final image. I used tracing paper and made 2 separate layers: a tree background layer, and another that had the objects that will be on top the table. I then scanned these into the computer and placed each one on Illustrator under separate layers.


That was the easy part. The next steps included tracing each layer using the Pen Tool. That involved making shadows for the bottom of the trees, creating a dense forest look with the branches and leaves, and of course, all the objects on the table.Throughout the tracing, colors were a major step. Including finding shadow colors, and creating gradients for some objects like the wine bottle. The last piece that I worked on were the music sheets, love letters, and the ground color. I made a gradient for the ground so that it would fade to black, to the distance in the woods. Then it is finished!

Once done, we saved the Illustrator document to a EPS, which is an Encapsulated Post Script. We then opened InDesign, placed the EPS document and created a small text box to include my name on my image. From here, we created a Package of our images, which included the font we used, the links for the Illustrator document, and a PDF of the image. Final step in this 3 week long process was printing and presenting!

Overall, I was a little nervous at first, attempting to successfully create my first Adobe image. But after working consistently, I became familiar with the tools and processes in the program. I am pretty proud of my work, and very eager to begin making new images and artwork. Below is a pdf of the final image!

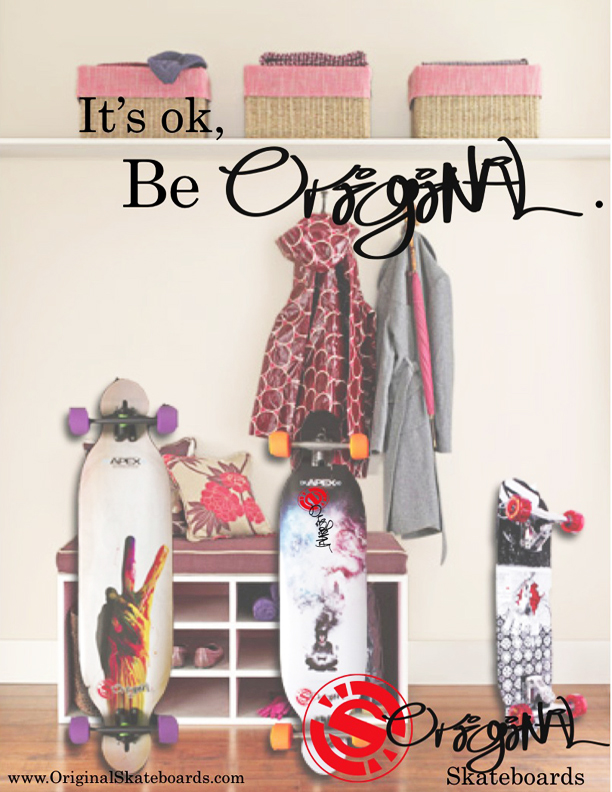
Money Object Illustration

Start of My Love for Communications

Standard

….My High School Yearbook!

Throughout my high school years, the club and extracurricular I have the most pride in participating in was Journalism, particularly the yearbook. I was allowed to join in my freshman year, something that rarely happened. I began helping capturing candids of the students in between classes and during lunch. I was also given my first byline, working on a timeline that began the first year my high school published a yearbook, and included other historical dates from my hometown and bits of national history.


This slideshow requires JavaScript.

The next year I was officially part of the yearbook staff, and given the position of co-Sports Editor. This position was perfect for me because I was a student athlete myself and associated with many of the coaches and athletics personnel of the school. Our duties included everything from designing the layout for the entire sports section, coordinating what to include on the pages, going to major games for action shots, and contacting each coach and team to schedule team and coach photos.

My Junior year was the most interactive and progressive year for me on the staff. I was given the position of co-editor of the yearbook. As a rule of thumb for our staff, we try to have both a senior and a junior editor-in-chief, so that there can always be a teacher and a student for not just the basic layout and planning aspects of the publication, but for the management and financial parts as well. I was included in all the discussions of costs and fees, helped coordinate the senior section, which included advertising to the upcoming seniors of where to have their senior portraits done and editing the senior section, which was reserved for the editors. It was by far the most stressful, but influential year for me in yearbook. I also helped work on the opening sections and sports section, and wrote/worked on a few more stories for our Mini Mag section, including my first spotlight article. Another reason I loved this yearbook more was it was the first time we came up with a theme and used it throughout the whole book. The theme was a Pirate’s Log, and we used terms like Admirals for the faculty and staff, named the Class section the Pirate’s Crew and gave a nautical rank title to each class.

My Senior year I moved up to senior editor-in-chief with another senior as my co-editor (I know we broke the rule.) I was most excited about the theme for this book because I thought of it from a song I was listening to one day and it brought with it all kinds of ideas for the book. The summer before my senior year I was given the chance, along with my former co-editor and our new advisor, to go to a yearbook convention of sorts in Orlando, Fl called Yearbookpalooza. There was hundreds of schools there and many professionals who gave classes and seminars the whole weekend on tips and workshops for creating the next year’s book. Each school was given the chance to sit down with a creative designer who used a special computer program to help create our cover. I took my song inspiration and gave her the idea to create a shoebox full of photographs, and the end result came out like you were looking in this shoebox and coming across your memories. This year was extra special for my high school and the staff because for the first time in FBHS history, our yearbook would be in full color! This opened so many more possibilites for photo ideas and stories and articles we could cover. We also went digital this year, going from layout paper and pica rulers, to an online website through Herff-Jones called eDesign. It was a major change for me and my staff, but we realized the benefits of working online and being able to edit multiple pages at once. I am by far the most proud of this book and the accomplishments we were able to achieve.